Day 71
In this sketch, I learn how to use the Leap Motion with TouchDesigner. For this exercise, I followed the MIR tutorial. I follow the tutorial closely. to understand how the leap motions talk to TD and how to use data from the leap motion to create interesting effects and; augmented reality experiences.
Tutorial
In this video, I demonstrate how rainbow fingers work.
This video demonstrates the augmented reality aspect of this project.
In this video, I show single finger use.
Single finger demonstrating in augmented reality.
Process
With this project, I just want to explore how the leap motion works. I ran into issues installing the driver. Touch Designer works with a specific version of the leap motion driver and took some time to track down the right one to get it to work. Once the driver was set up it's as easy as plug and play.
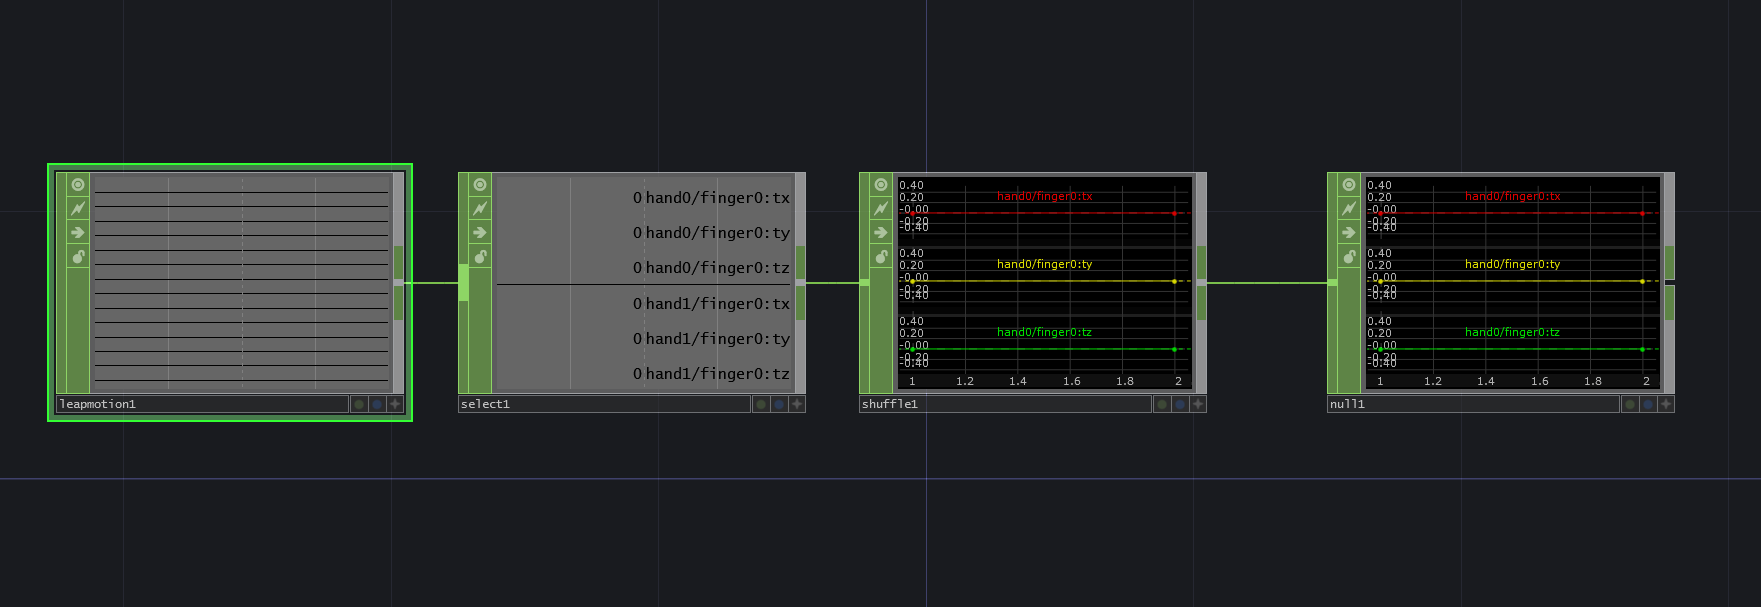
Using the tutorial I understand how to get the data points for the hand tracking in Touch Designer. As MIR explains, first I set up the data system using Leap Motion CHOP. From there I can select the various data points I need.
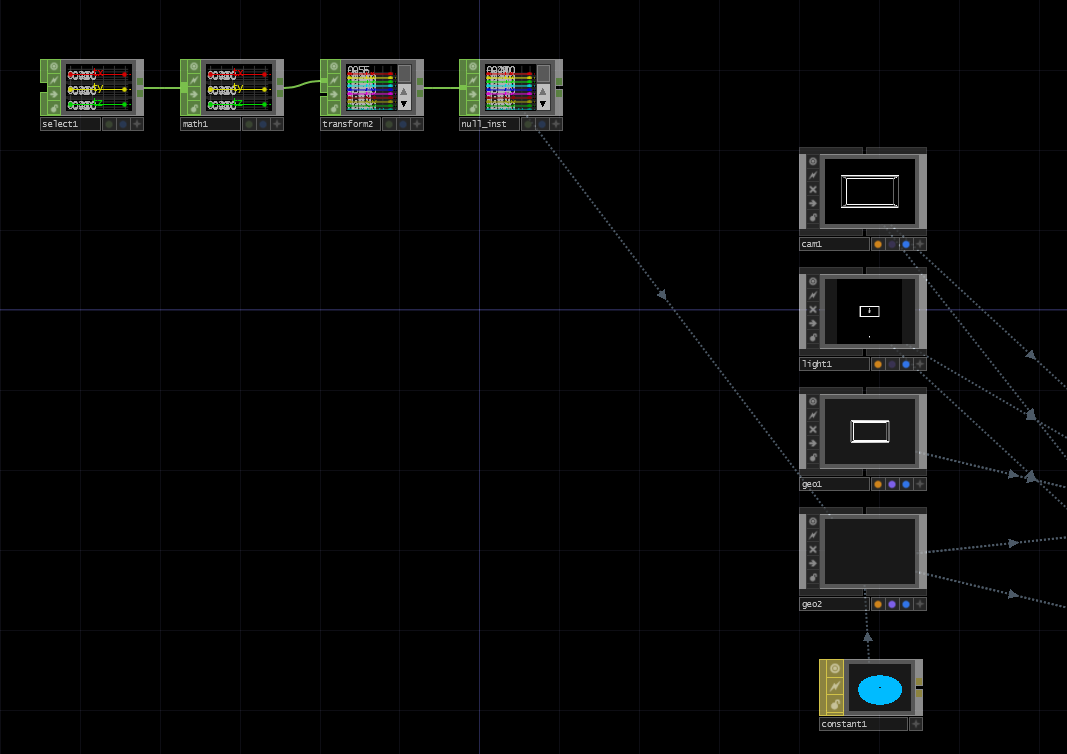
Next, I link the data to another CHOP on a different Base system to create the effect. The CHOP data is fine-tuned using Math and is driving the Geometry setup.
Then I apply feedback set up to create the illusion, as well as various other nodes such as color effects.
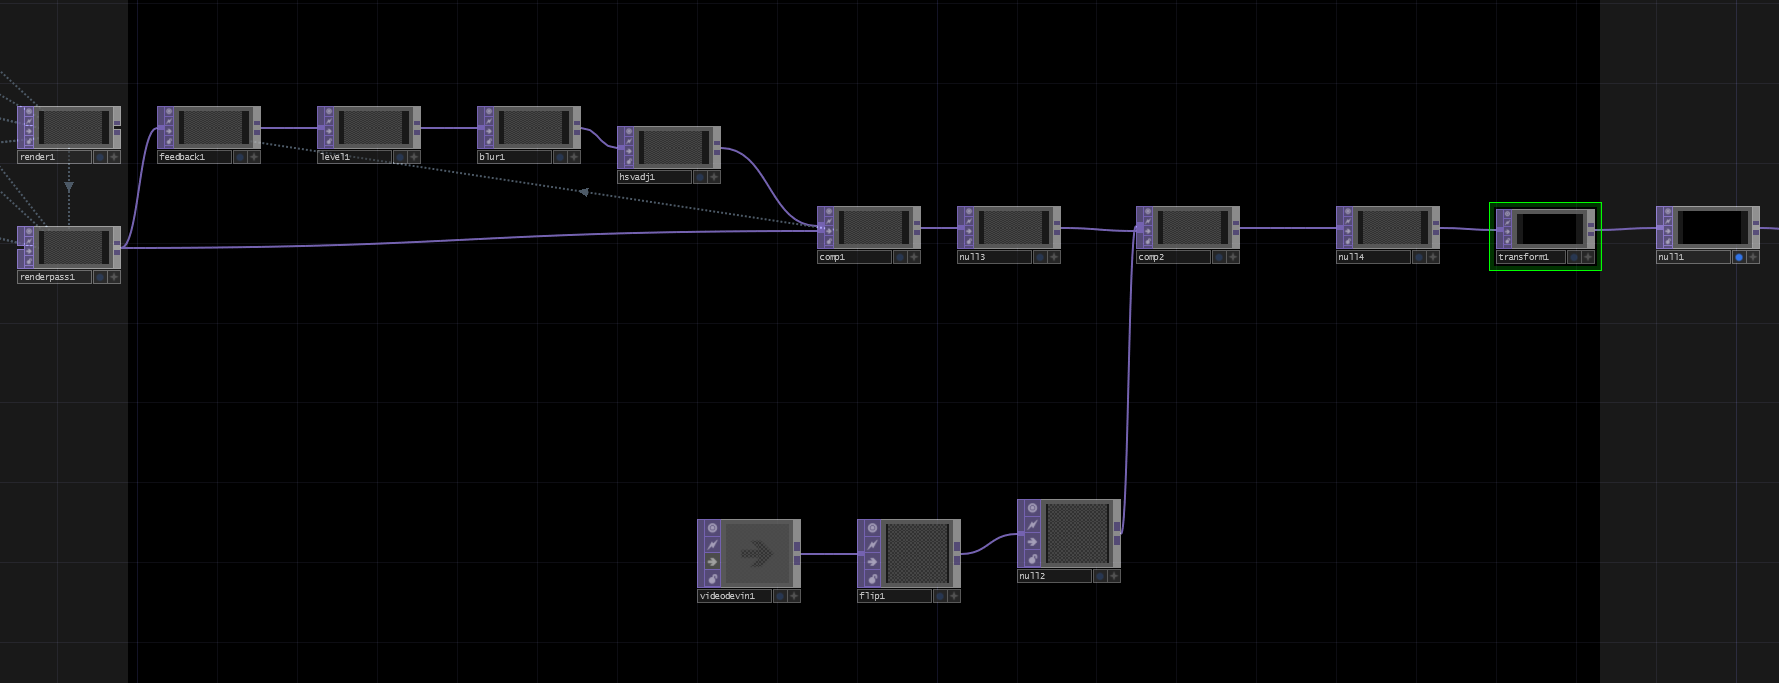
To stay true to augmented reality I can include the built-in camera so that it looks like the rainbow fingers are inside of the physical space.